Google Workspace (Formerly G Suite) Setup Part 1

Ahmed Osama
Last Update 4 jaar geleden
Note: At this time, Google Workspace is only available for HostGator's Shared Hosting (Hatchling, Baby, and Business) packages. All other hosting packages can utilize this service by purchasing directly from Google.
The setup process can be broken up into two quick parts, leaving you with more time to focus on your business aspects that demand your attention. Part 1 will cover the following steps:
Step 1: Google Terms of Service⤵
Step 2: Verify Your Domain⤵
Domain Verification Failure⤵
Step 3: Set Up MX Records⤵
Bringing the power and innovation of Google to your business is now easier than ever with BearHosts's integrated Google Workspace Dashboard, found within your very own Customer Portal. For information on how to purchase Google Workspace for your new or existing account, please refer to the following article:
What is Google Workspace (Formerly G Suite)?
To begin your Google Workspace setup, you will need to do so from within your Customer Portal. For information on how to log in, please refer to the following article:
Customer Portal - How to Login
Step 1: Google Terms of Service
The first portion of the setup process focuses on providing you with the Google Terms of Service Agreement. After logging into your Customer Portal, please click on the Hosting tab. Then click the Google Workspace icon from your menu bar to navigate to your Google Workspace Dashboard.
As illustrated in the image below, you can view and accept the Google ToS by clicking on the associated link:
Google Terms of Service
Note: The Google Workspace setup process will not progress until the Google Terms of Service is accepted. This step should be completed before domain verification and updating your domain's MX records.
When you click View and Accept Google's ToS, you will be redirected to log into your Admin Console. To login, please use the Admin Email and password you chose when ordering as your login credentials.
Note: If you are already logged into another Google account, you will need to log out before logging into your Google Workspace account.
Step 2: Verify Your Domain
My Domain is Utilizing BeaHosts Name Servers
Domains using BearHosts name servers will automatically be verified when adding this service to your account. This step can be overlooked as you will not need to verify your domain to utilize Google Workspace manually.
For additional information on how to point your DNS to BearHosts, please see the following articles:
How to Point My Domain to BearHosts When Using DNS Elsewhere
What Are My Name Servers?
How Do I Change My DNS or Name Servers?
Note: If you are using BearHosts nameservers, we can directly assist you with creating the necessary DNS records if you contact us via phone or Live Chat.
My Domain is NOT Utilizing HostGator Name Servers
For domains that are not using BearHosts name servers, manual verification through your DNS provider can be used to verify your ownership of the domain. You will be provided a verification code that you will use to create a TXT Record.
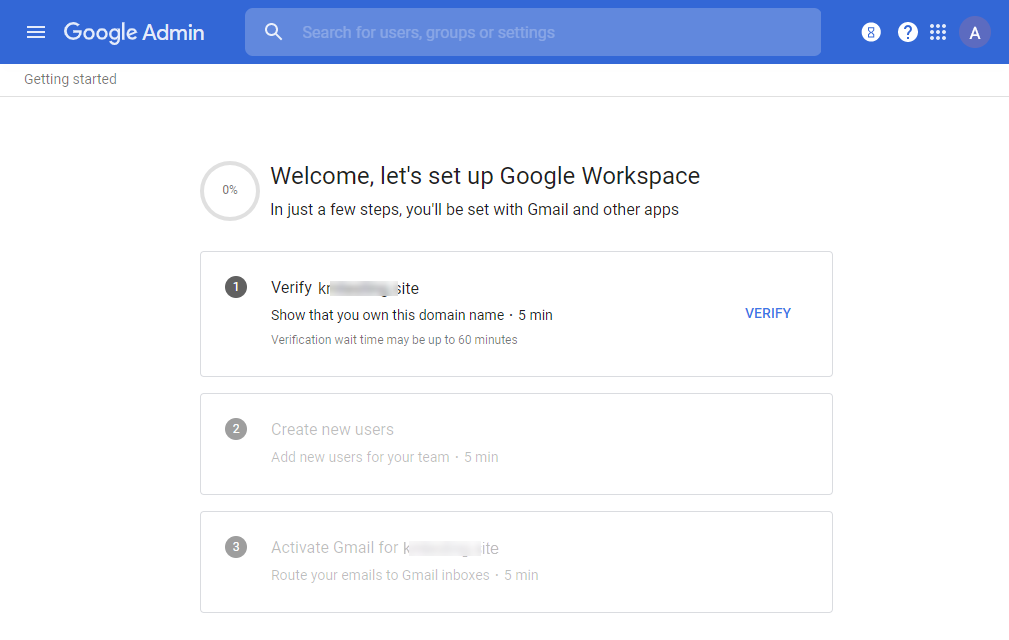
Once you're in your Admin Console, you will see a notification on the upper left-hand side that states Finish setting up Admin Console. Clicking on this will take you to the Admin Console setup experience, which will walk you through verifying your domain, creating users, and adding the necessary MX Records to route your email to Google Workspace.
If you do not see the Finish setting up Admin Console notification, you can get to the setup experience by following the steps below.
Click on Domains.
Select Manage domains.
Then, to the right of Primary Domain, click on Admin Console setup, and it will take you to the new setup experience.
Click Verify in the first box.
- The next screen will walk you through verifying your domain by adding a TXT record to your domain settings. The Verification Code is a unique code that is automatically generated for you.
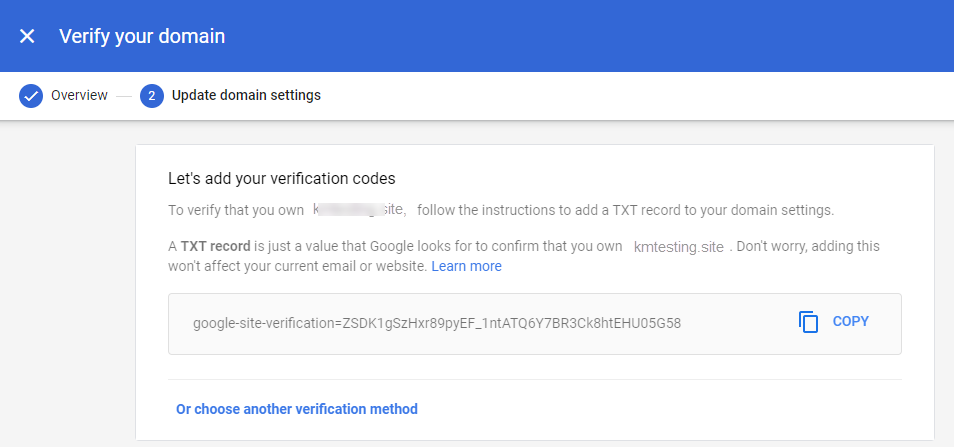
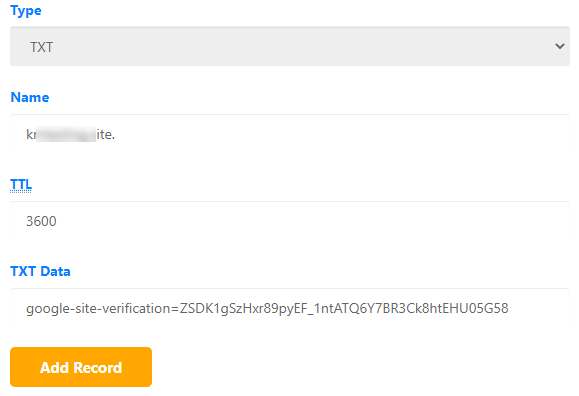
- The verification code will go into the TXT Data field of your DNS record, as illustrated below. The verification code will begin with “google-site-verification=,” followed by your unique code.
- Note: The following example is based on the cPanel Advanced DNS Zone Editor and may not directly resemble your DNS providers management portal. For more direct support and instructions on creating TXT records, you may need to consult with your domain’s DNS hosting provider.
After you have completed the above steps and allowed time for propagation, you may click the Verify Domain button to determine if your domain name has been successfully verified. Once your domain has been verified, you will see a green confirmation message and be returned to the main setup screen.
Domain Verification Failure
Propagation
Attempts to verify your domain's ownership will fail if the changes made are still propagating. Simply put, propagation is the projected length of time it takes for root name servers and cache records across the entire web to be updated with your website's DNS information. Because of propagation, Google may not detect the DNS changes made right away. For TXT Records, this time frame is most commonly between 0 and 4 hours but can take up to 48 hours.
For additional information on propagation times for TXT records, please refer to the following article:
Propagation Times
Step 3: Setup DNS Records
My Domain is Utilizing BearHosts Name Servers
Domains using HostGator name servers will be given the option to update their DNS records from within their Customer Portal. If you're not ready to enable this service right away, you can return to this page at any time to update your MX records. Clicking the I understand, set my MX records to go to Google button will add all of the MX and SPF records to your DNS settings automatically.
Once the records have a chance to propagate, you will be able to return to the Admin Console setup, and click Activate in the third box, Activate Gmail for yourdomain.com.
My Domain is NOT Utilizing BearHosts Name Servers
If your domain is not using BearHosts name servers, then you can follow the steps below to add the MX, SPF, and optional CNAME records needed to route your email to Google Workspace.
The following article will help assist you with changing your MX records in cPanel:
How do I change my site's MX record to point mail to another server or domain?
How to Set Up Your MX (Mail Exchange) Record
The SPF and CNAME records can be created or edited from the Advanced DNS Zone Editor in cPanel. More information on creating and editing DNS records can be found here:
Changing DNS Records
The DNS records you will need to create are as follows:
Google MX Records
MX Records, also referred to as MX Destinations, are entries in your domain’s DNS that route your email to a specific server. To take full advantage of the Google Applications suite, you will need to update these entries for your domain.
Note: Google Workspace requires MX record changes, which will change the routing for ALL email addresses for that domain.